
Install product memory
This product has one DIMM slot.
CAUTION:
Static electricity can damage electronic components. When handling DIMMs, either wear
an antistatic wrist strap or frequently touch the surface of the DIMM antistatic package, then touch bare
metal on the product.
1.
Print a configuration page to find out how much memory is installed in the product before adding
more memory.
a. At the product control panel, press the Home button.
b. Open the following menus:
●
Administration
●
Reports
●
Configuration/Status Pages
●
Configuration Page
156
Chapter 9 Manage and maintain
ENWW
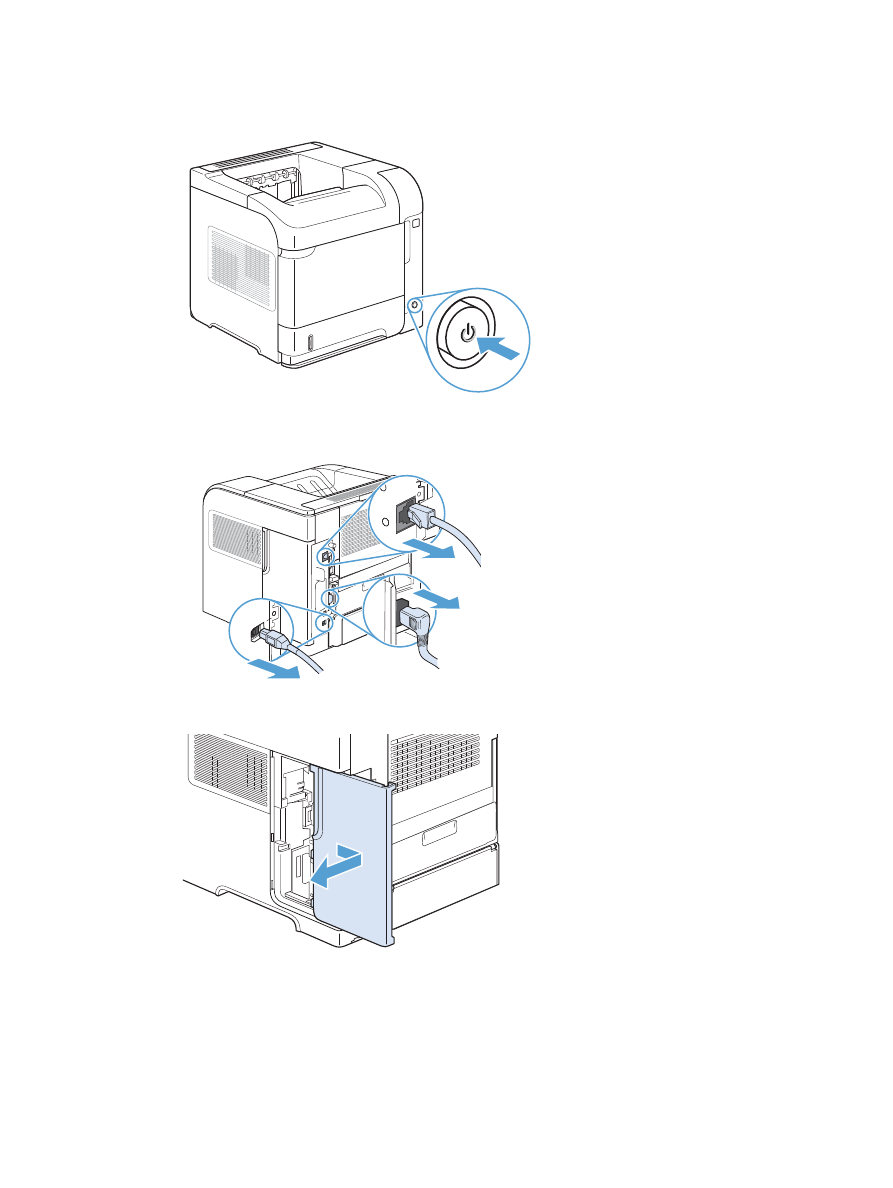
2.
After the configuration page has printed, turn the product off.
3.
Disconnect the power cord and interface cable.
4.
Remove the right-side panel by sliding it towards the rear of the product to unlatch it.
ENWW
Install memory and internal USB devices
157
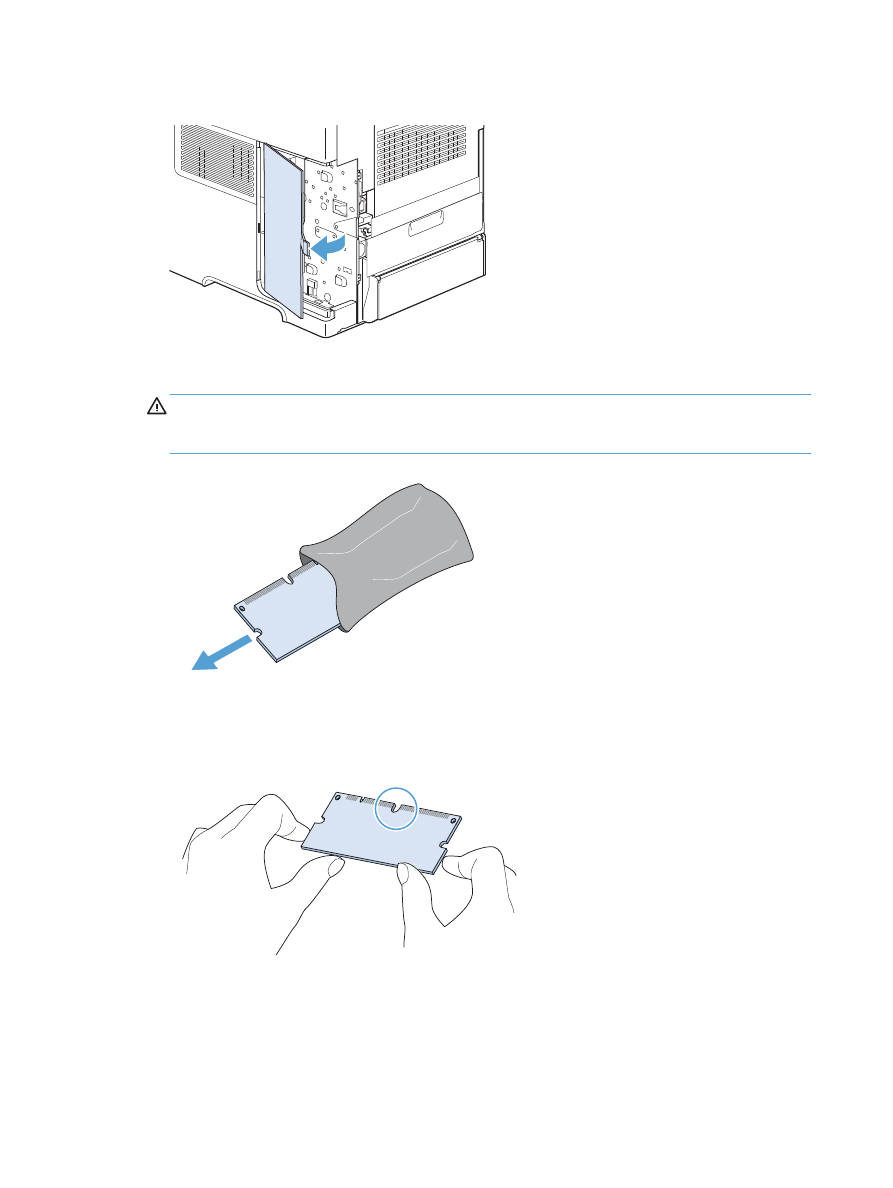
5.
Open the access door by pulling on the metal tab.
6.
Remove the DIMM from the antistatic package.
CAUTION:
To reduce the possibility of damage caused by static electricity, always wear an
electrostatic discharge (ESD) wrist strap or touch the surface of the antistatic package before
handling DIMMs.
7.
Hold the DIMM by the edges, and align the notches on the DIMM with the DIMM slot. (Check that
the locks on each side of the DIMM slot are open.)
158
Chapter 9 Manage and maintain
ENWW
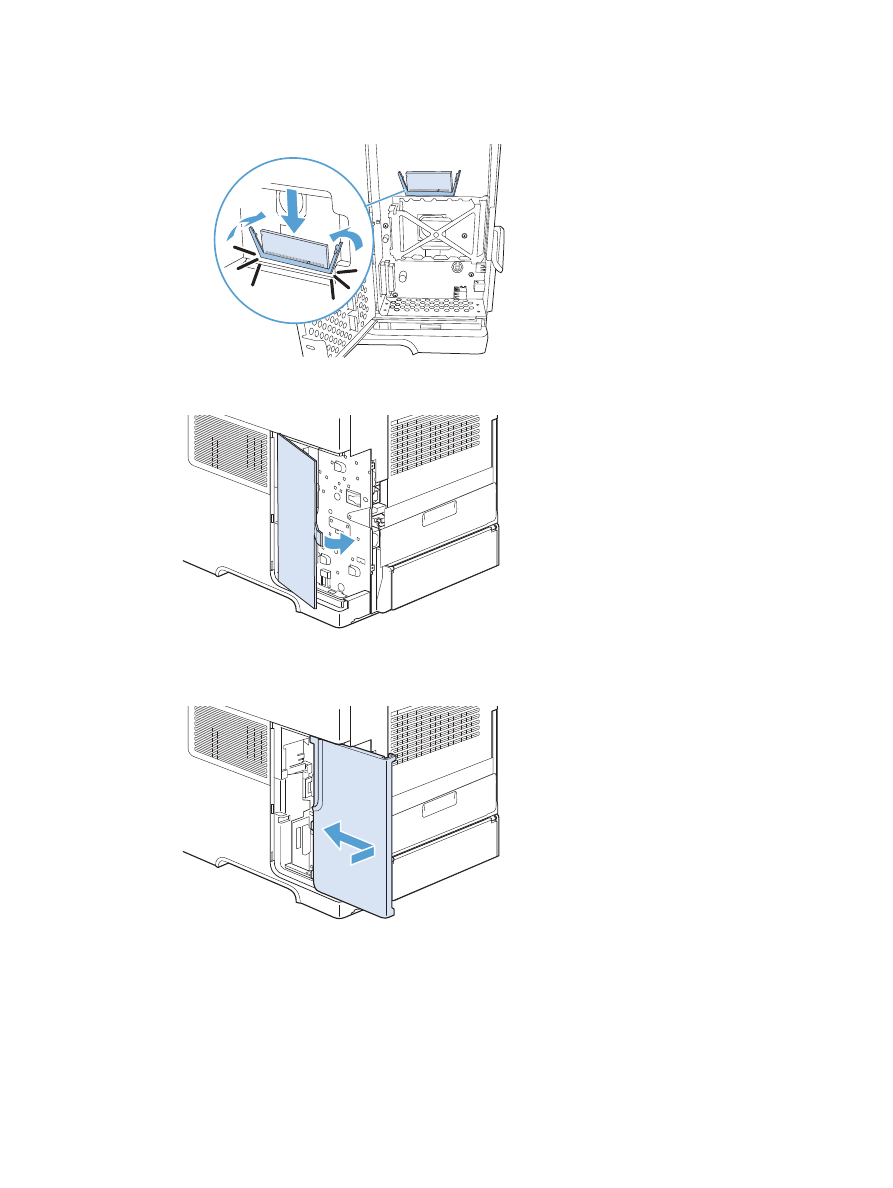
8.
Press the DIMM straight into the slot, and press firmly. Make sure the locks on each side of the
DIMM snap into place.
9.
Close the access door, and press firmly until it snaps into place.
10.
Reinstall the right-side panel. Align the tabs on the panel with the slots in the product, and push the
panel toward the front of the product until it latches into place.
ENWW
Install memory and internal USB devices
159
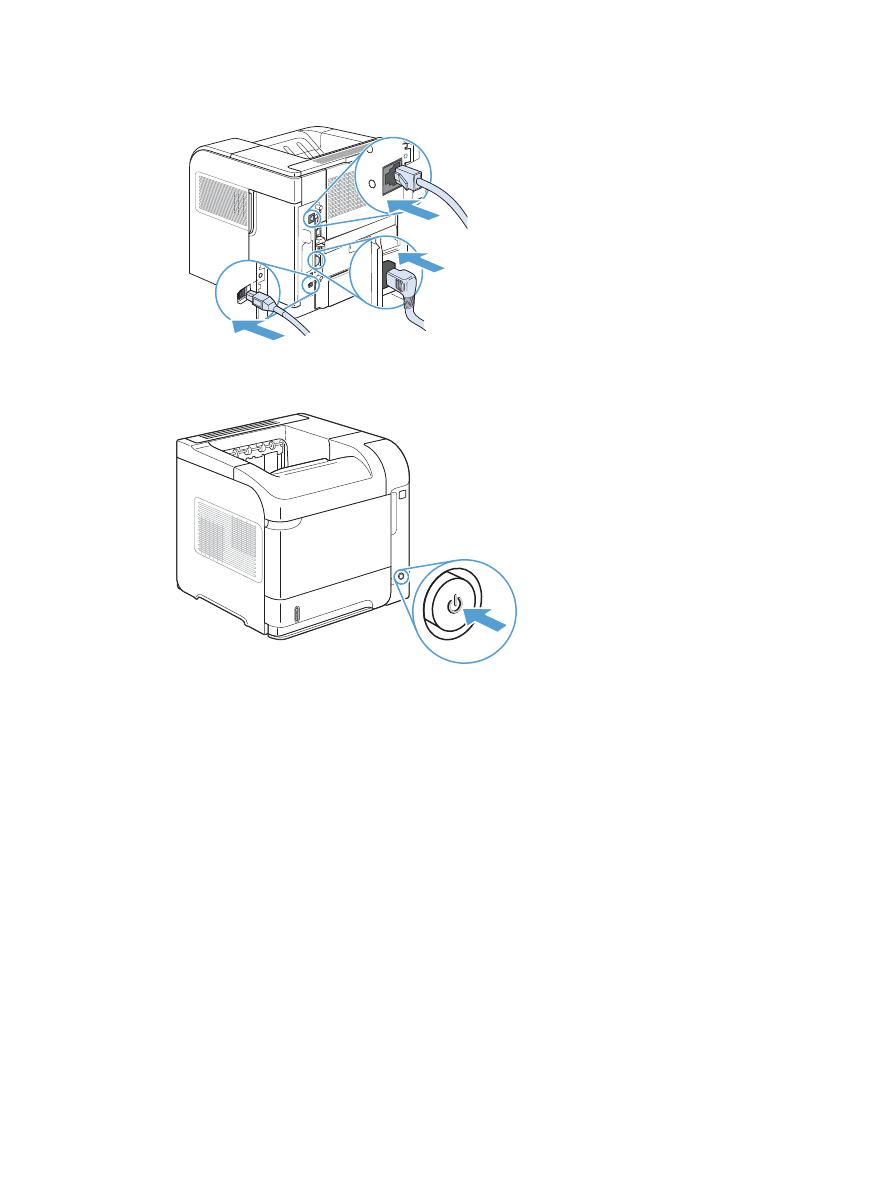
11.
Reconnect the interface cable and the power cord.
12.
Turn the product on.
160
Chapter 9 Manage and maintain
ENWW